
Imagine biting into a juicy, perfectly cooked chicken with crispy skin that melts in your mouth. You can achieve this right in your backyard using your gas grill.
Rotisserie cooking locks in flavor and keeps the meat tender, making your meal unforgettable. If you’ve ever wondered how to rotisserie a whole chicken on a gas grill, you’re in the right place. This simple guide will show you step-by-step how to turn your grill into a rotisserie oven and impress everyone at your next cookout.
Ready to master this skill and elevate your grilling game? Let’s get started!
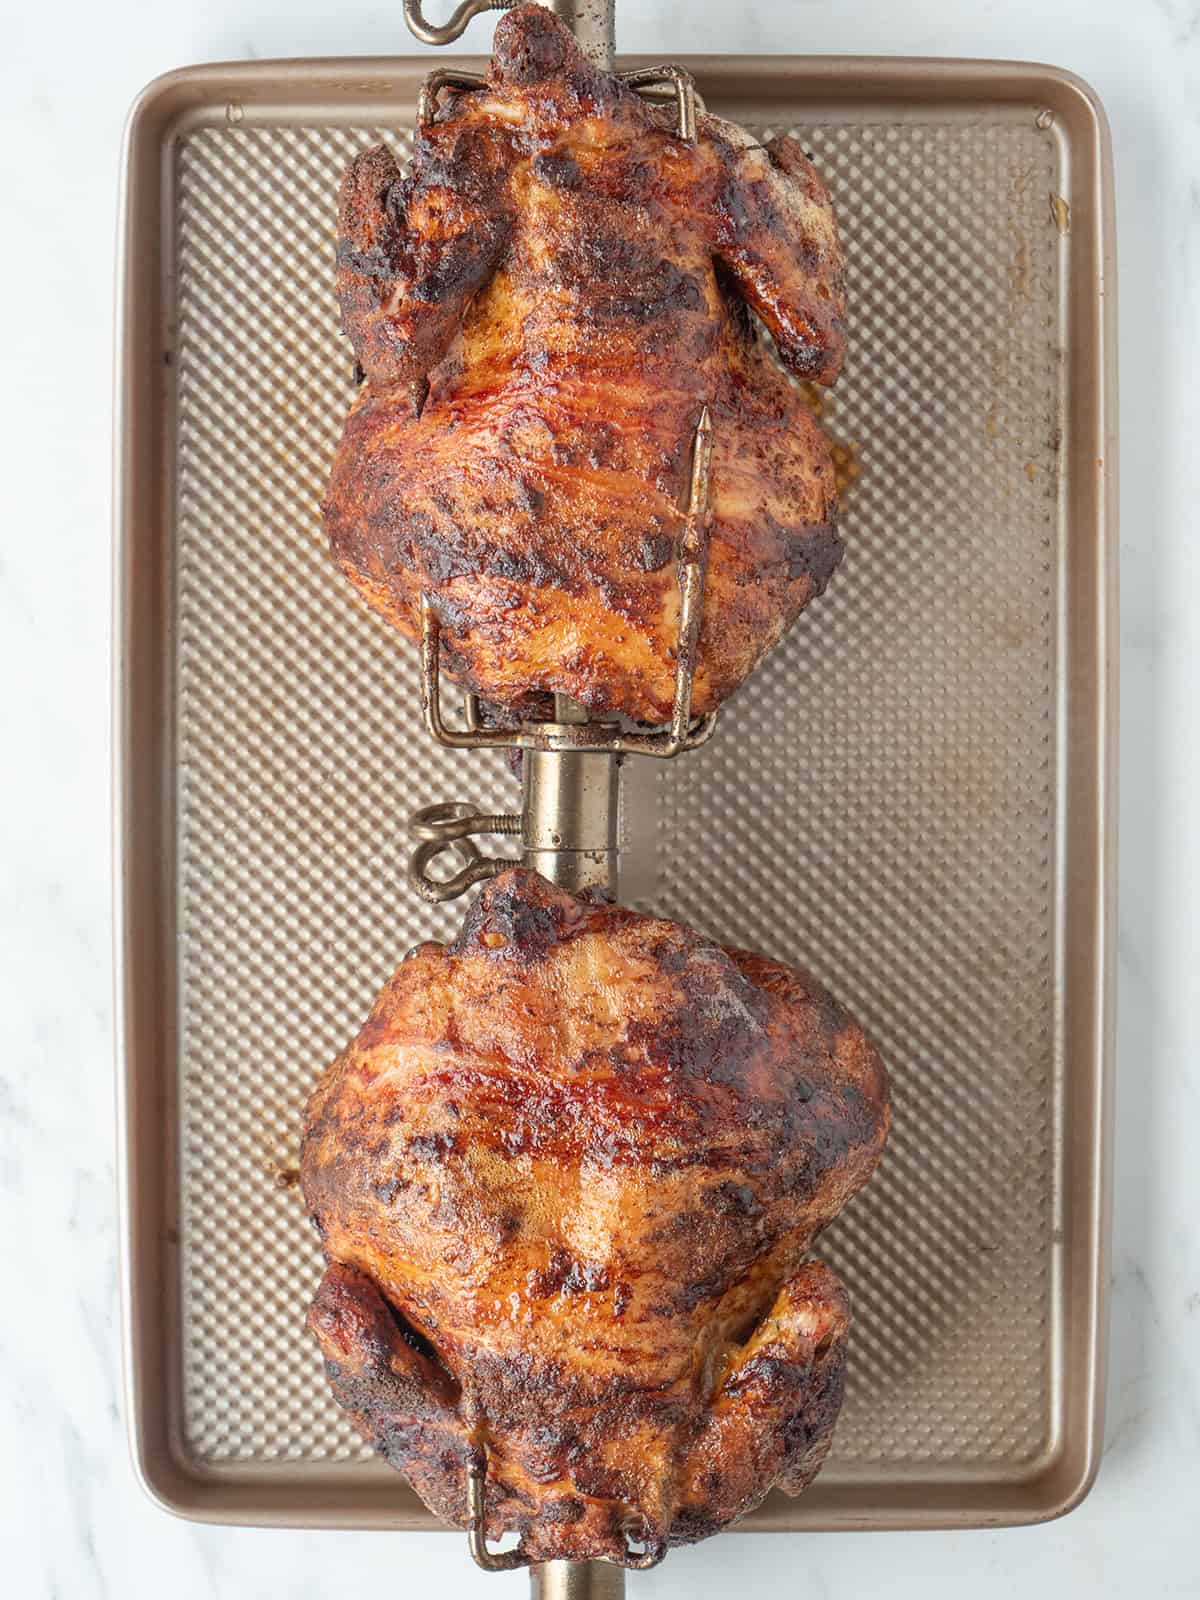
Credit: whatsgabycooking.com
Choosing The Right Chicken
Choosing the right chicken is important for a delicious rotisserie meal. The size and quality of the chicken affect how it cooks. Picking the best bird helps you get juicy meat and crispy skin every time.
Selecting The Best Size
Choose a chicken that fits your grill’s rotisserie spit. Most gas grills work well with chickens between 3 to 5 pounds. Smaller chickens cook faster and stay tender. Larger ones take more time but serve more people.
Make sure the chicken is balanced on the spit rod. This helps it rotate evenly. If the chicken is too large or small, it might not cook properly. Balanced rotation means even browning and juicy meat.
Organic Vs. Conventional
Organic chickens are raised without antibiotics or hormones. They often have a richer flavor. Conventional chickens may be less expensive and easier to find. Both types work well for rotisserie cooking.
Consider your budget and taste preferences. Organic chicken can be a healthier choice. Conventional chicken still delivers great results on the grill. The key is freshness and quality, no matter the type.
Essential Equipment
Rotisserie cooking on a gas grill needs specific tools for best results. The right equipment helps cook the chicken evenly and safely. Each tool plays a key role in making the process smooth and enjoyable. Prepare these items before starting your rotisserie chicken.
Rotisserie Kit
A rotisserie kit is essential for this cooking style. It includes a spit rod and forks that hold the chicken firmly. The motor turns the spit rod slowly, allowing the chicken to cook evenly. Most gas grills have space or attachments for a rotisserie kit. Choose one that fits your grill model for easy setup.
Meat Thermometer
A meat thermometer ensures the chicken is perfectly cooked inside. Insert the probe into the thickest part of the chicken. Check the temperature regularly to avoid undercooking or overcooking. The safe internal temperature for chicken is 165°F (74°C). A good thermometer gives quick and accurate readings.
Grill Tools
Basic grill tools help handle the chicken safely. Long-handled tongs and heat-resistant gloves protect your hands from heat. A basting brush allows you to add marinades or sauces while cooking. Have a sturdy cutting board and sharp knife ready for carving after cooking.
Preparing The Chicken
Preparing the chicken well is essential for a juicy, flavorful rotisserie meal. Each step helps the chicken cook evenly and keeps it moist. Proper preparation also enhances taste and presentation.
Cleaning And Patting Dry
Start by rinsing the chicken inside and out under cold water. Remove any leftover feathers or giblets from the cavity. Use paper towels to pat the chicken completely dry. Dry skin helps to crisp up during grilling and prevents steaming.
Trussing Techniques
Trussing keeps the chicken compact and cooks evenly on the rotisserie spit. Use kitchen twine to tie the legs together tightly. Tuck the wings under the body to avoid burning. This also prevents the chicken from wobbling while rotating.
Seasoning Options
Seasoning adds flavor and aroma to the chicken’s skin and meat. Rub the chicken with olive oil or melted butter to help spices stick. Use simple spices like salt, pepper, garlic powder, and paprika. For extra flavor, stuff the cavity with lemon wedges, garlic cloves, or fresh herbs like rosemary and thyme.
Setting Up The Gas Grill
Setting up your gas grill properly is key for a juicy rotisserie chicken. The right setup controls the heat and cooks the chicken evenly. It prevents flare-ups and burning. Start by arranging the burners to create a steady, indirect heat zone. This setup ensures the chicken cooks slowly and stays moist inside. Proper setup also makes turning the chicken on the rotisserie easier and safer.
Indirect Heat Setup
Turn on only the burners on one side of the grill. Leave the other side off to create a cooler zone. Place a drip pan under the rotisserie area to catch fat drips. This helps avoid flare-ups and keeps the grill clean. Position the rotisserie spit over the unlit side. The heat will circulate around the chicken without direct flames. This method cooks the chicken evenly and prevents burning.
Preheating The Grill
Close the grill lid and preheat on high for 10 to 15 minutes. Preheating ensures the grill reaches a steady temperature. Aim for a temperature of 350°F (175°C) near the rotisserie area. Use a grill thermometer to check the heat accurately. Once the grill is hot, lower the temperature to medium or adjust burners. Maintain steady heat throughout the cooking process for the best results.
Mounting The Chicken On The Rotisserie
Mounting the chicken on the rotisserie is a crucial step that sets the foundation for evenly cooked, juicy meat. If the chicken isn’t properly secured and balanced, it will spin unevenly, causing uneven cooking and potential flare-ups. Taking the time to mount it correctly ensures a smooth rotation and consistent heat exposure.
Securing The Chicken
Start by removing any giblets and pat the chicken dry. This helps the skin crisp up nicely during cooking. Next, insert the rotisserie spit rod through the center of the chicken, from the neck cavity down to the tail end.
Use the rotisserie forks to firmly clamp the chicken in place. Tighten the screws on the forks to hold the bird securely. If the chicken feels loose or shifts when you gently rotate the spit, adjust the forks until it’s firmly attached.
Don’t forget to tuck the wings under the bird or secure them with kitchen twine to prevent flapping. Loose wings can catch fire or cause imbalance while spinning.
Balancing The Load
Balance is key. An unbalanced chicken will put extra strain on your grill’s rotisserie motor and cook unevenly. To check balance, try spinning the spit by hand before turning on the motor.
If the chicken wobbles or swings, reposition it on the spit rod. Sometimes shifting it slightly forward or backward makes a big difference. You can also use a second rotisserie fork to help stabilize the bird.
Ask yourself: does the spit feel evenly weighted on both sides? If not, adjust until the rotation feels smooth and steady. A well-balanced chicken means your grill will work efficiently and your chicken will cook perfectly.
Cooking The Chicken
Cooking the chicken on a gas grill using a rotisserie ensures even heat and juicy meat. The chicken slowly turns, allowing its fat to baste the meat naturally. This method creates a crispy skin and tender inside. Paying attention to temperature and time helps avoid overcooking or drying out the chicken.
Monitoring Temperature
Keep the grill temperature steady between 300°F and 350°F. Use a grill thermometer to check the heat regularly. Insert a meat thermometer into the thickest part of the chicken’s thigh. The chicken is safe to eat once it reaches 165°F inside. Avoid opening the grill too often to keep heat stable.
Time Estimates
Cooking time depends on the chicken’s weight. A 4 to 5-pound chicken takes about 1.5 to 2 hours on the rotisserie. Turn the chicken slowly and evenly throughout the cooking process. Check the temperature after 1 hour to track progress. Rest the chicken for 10 minutes before carving to keep juices inside.
Ensuring Juiciness
Ensuring your rotisserie chicken stays juicy is key to enjoying every bite. It’s not just about cooking it evenly but also about locking moisture inside. Let’s look at some smart ways to keep your chicken tender and flavorful throughout the grilling process.
Basting Techniques
Basting your chicken regularly adds moisture to the skin and helps keep the meat juicy. Use a simple mixture of melted butter, garlic, and herbs for a rich flavor boost.
Apply the baste every 15 to 20 minutes while the chicken spins on the rotisserie. This prevents the meat from drying out and builds a beautiful, crisp exterior.
Have you tried injecting a marinade inside the chicken before basting? It’s a game-changer that delivers flavor deep into the meat, not just on the surface.
Resting Period
After your chicken finishes cooking, resist the urge to cut into it right away. Let it rest for at least 10 to 15 minutes to allow the juices to redistribute evenly.
Resting keeps the moisture locked inside the meat rather than spilling out onto your cutting board. Cover the chicken loosely with foil to retain warmth without steaming the skin.
Think of resting as the final step that seals in all your hard work and flavors. How often do you let your grilled chicken rest before serving? Try this next time and notice the difference in juiciness.
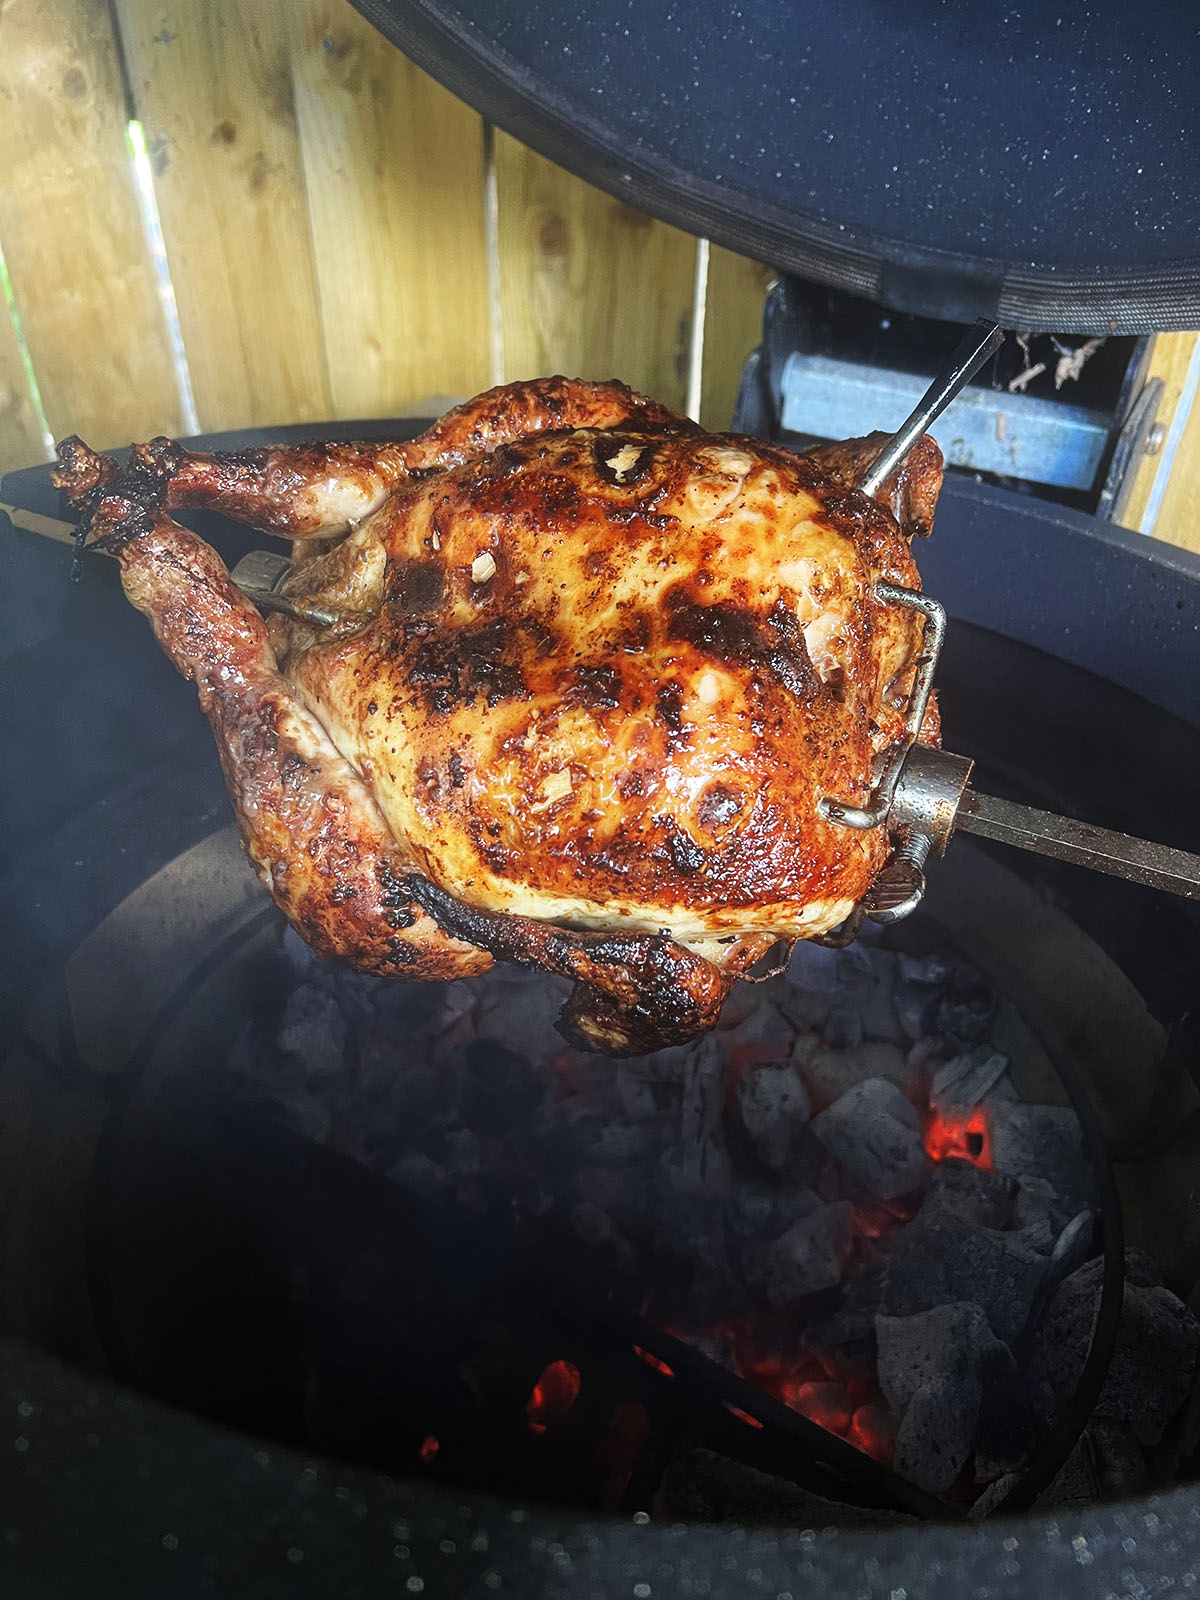
Credit: greatcurryrecipes.net
Carving And Serving
Carving and serving your rotisserie chicken is the final step that transforms your grilled masterpiece into a delicious meal. How you slice the chicken can affect both the presentation and the eating experience. Let’s dive into some practical carving tips and serving ideas to make the most out of your perfectly cooked bird.
Carving Tips
Start by letting the chicken rest for about 10 minutes after grilling. This helps the juices redistribute, making the meat juicier and easier to cut.
Use a sharp carving knife for clean, precise cuts. Dull knives can tear the meat and cause frustration.
- Begin by removing the legs and thighs. Cut through the joint where the thigh connects to the body.
- Next, carve the wings off by cutting through the joint near the breast.
- Finally, slice the breast meat against the grain into even pieces for tenderness.
Have you noticed how slicing against the grain makes the chicken feel softer? This small trick changes how the meat feels in your mouth.
Serving Suggestions
Serve your rotisserie chicken with simple sides that complement its smoky flavor. Think roasted vegetables, garlic mashed potatoes, or a fresh garden salad.
Consider drizzling some pan juices or a light gravy over the carved pieces for extra moisture and flavor.
- Use fresh herbs like parsley or thyme as a garnish to add color and aroma.
- Pair your chicken with a crisp white wine or a cold craft beer to enhance the meal.
- Turn leftovers into sandwiches or salads the next day for zero waste and maximum taste.
What side dishes do you find bring out the best in your grilled chicken? Experimenting with new flavors can make your meal more exciting every time.
Troubleshooting Common Issues
Rotisserie cooking on a gas grill can sometimes bring challenges. Some common problems may affect your chicken’s texture and taste. Knowing how to fix these issues will help you enjoy juicy, well-cooked chicken every time. This section covers the most frequent troubles and easy solutions.
Uneven Cooking
Uneven cooking means parts of the chicken cook faster than others. This happens when heat distribution is not balanced.
- Check that the chicken is centered on the rotisserie spit.
- Use a drip pan to help reflect heat evenly.
- Adjust grill burners to maintain steady, indirect heat.
- Rotate the spit slowly and consistently to avoid hot spots.
- Use a meat thermometer to check internal temperature in multiple spots.
Dry Meat Solutions
Dry meat is a common problem with rotisserie chicken. It happens when the chicken cooks too long or at too high heat.
- Marinate or brine the chicken before cooking to keep it moist.
- Cook at a lower temperature around 300°F to 350°F for gentle heat.
- Baste the chicken periodically with juices or butter to add moisture.
- Remove the chicken from the grill as soon as it reaches 165°F inside.
- Let the chicken rest for 10 minutes before carving to keep juices inside.

Credit: monumentgrills.com
Frequently Asked Questions
How Long Does It Take To Rotisserie A Whole Chicken?
Rotisserie cooking usually takes 1 to 1. 5 hours for a whole chicken. Cooking time depends on chicken size and grill temperature. Aim for an internal temperature of 165°F for safe consumption. Use a meat thermometer to check doneness accurately.
What Temperature Should A Gas Grill Be For Rotisserie?
Set your gas grill to medium heat, around 300°F to 350°F. This temperature ensures even cooking without burning the chicken. Maintain steady heat throughout the cooking process for the best results. Adjust burners as needed to keep temperature consistent.
How Do You Secure A Whole Chicken On A Rotisserie Spit?
Truss the chicken tightly with kitchen twine to keep it compact. Slide the chicken onto the spit rod, centering it for balance. Use the spit forks to firmly hold the chicken in place. Proper securing prevents wobbling and promotes even cooking.
Can I Use Marinades When Rotisserie Grilling Chicken?
Yes, marinades add flavor and moisture to rotisserie chicken. Marinate the chicken for at least 1-2 hours before cooking. Pat dry to reduce flare-ups on the grill. Avoid sugary marinades that can burn easily during cooking.
Conclusion
Rotisserie cooking gives your chicken a tasty, even cook. The gas grill keeps heat steady and simple to control. Follow the steps carefully to get juicy, crispy skin. Try different spices for flavors you enjoy. Practice makes perfect, so don’t worry if it’s not perfect the first time.
Enjoy a delicious meal with family or friends. Rotisserie chicken on a gas grill is a great way to cook outdoors. Give it a try and taste the difference.