
If you’ve ever wanted to enjoy juicy, perfectly cooked chicken with a crispy, golden skin, using a grill rotisserie is the secret you need to master. But how exactly do you put a chicken on a grill rotisserie so it cooks evenly and stays secure?
You might be worried about the chicken slipping, cooking unevenly, or the whole process feeling complicated. Don’t worry—this guide will walk you through every simple step, making it easy for you to impress your family and friends with restaurant-quality rotisserie chicken right at home.
Ready to become the grill master you’ve always wanted to be? Let’s get started!
Choosing The Right Chicken
Choosing the right chicken is key for a perfect rotisserie grilling experience. The type of chicken affects cooking time, flavor, and texture. Picking the best chicken helps the rotisserie cook evenly and stay juicy. Consider size, weight, and freshness before placing it on the spit.
Size And Weight Considerations
Pick a chicken that fits your rotisserie spit and grill. A bird too large may not rotate smoothly. Too small, and it might cook too fast or dry out.
- Ideal weight: 3 to 5 pounds for balanced cooking
- Check the grill’s weight limit for safe rotation
- Choose a uniform shape for even heat exposure
Fresh Vs. Frozen Options
Fresh chicken often has better texture and flavor. It cooks evenly and stays moist on the rotisserie.
Frozen chicken is convenient but needs full thawing first. Thaw it completely to avoid uneven cooking or food safety risks.
- Buy fresh for best taste and juiciness
- Use frozen only if thawed properly
- Check expiration dates and packaging for quality
Credit: whatsgabycooking.com
Essential Tools And Equipment
Grilling a chicken on a rotisserie transforms a simple meal into a flavorful experience. To get it right, having the right tools and equipment is crucial. The gear you choose will impact how evenly your chicken cooks and how easy the process feels.
Selecting The Rotisserie Kit
Look for a rotisserie kit that fits your grill model. Some kits are universal, but many are designed for specific brands or sizes. A good kit includes a sturdy spit rod, reliable motor, and strong forks to hold the chicken firmly in place.
Check the motor’s power—too weak and it might struggle to turn the chicken evenly. Also, consider the length of the spit rod; it should be long enough to hold your chicken without crowding. I once tried a cheap kit with a weak motor, and the chicken ended up unevenly cooked, which taught me the value of investing in quality.
Additional Accessories Needed
Besides the rotisserie kit, some accessories make the process smoother. Heat-resistant gloves protect your hands when handling hot equipment. A drip pan placed under the chicken catches fat and juices, preventing flare-ups and easing cleanup.
Consider a meat thermometer, too. It helps you monitor the internal temperature without guessing. Do you want your chicken perfectly juicy or risk overcooking? This simple tool answers that question for you every time.
Preparing The Chicken
Preparing the chicken properly is essential for a delicious rotisserie meal. This process helps enhance flavor and ensures even cooking. It also makes handling the chicken easier on the grill. Taking time here will improve your grilling experience and final taste.
Cleaning And Trimming
Start by rinsing the chicken under cold water. Remove any leftover feathers or bits of fat. Pat the chicken dry with paper towels to help the skin crisp up. Check inside the cavity and remove giblets or neck if present. Trim excess fat or loose skin around the edges. This prevents flare-ups and uneven cooking on the grill.
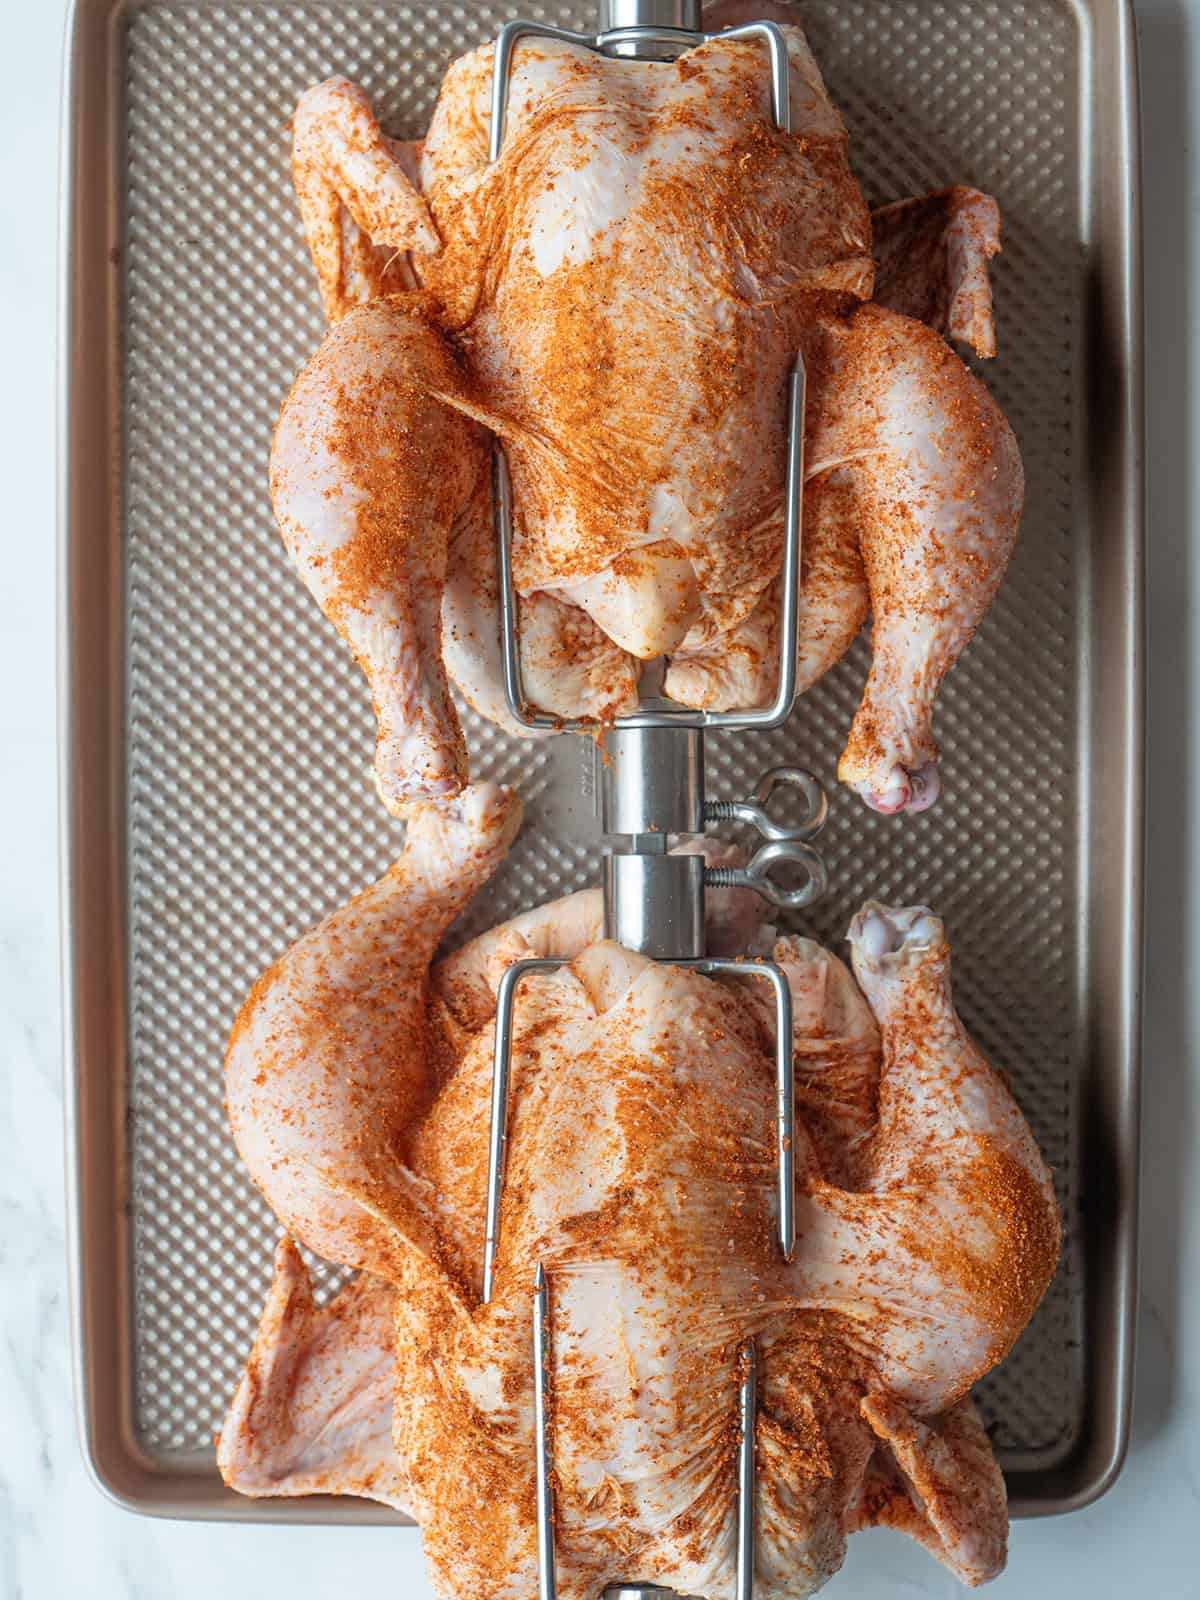
Seasoning And Marinades
Seasoning adds flavor and keeps the chicken juicy. Use simple salt and pepper for a classic taste. Rub seasoning all over the chicken, including inside the cavity. Marinades soak into the meat and tenderize it. Use a mix of oil, acid (like lemon juice or vinegar), and herbs. Let the chicken rest in the marinade for at least one hour. This step boosts flavor and helps the skin brown nicely.
Setting Up The Grill
Setting up your grill correctly is the foundation for a perfectly cooked rotisserie chicken. It’s not just about turning on the heat; it’s about controlling the environment so the bird cooks evenly and stays juicy. Understanding your grill type and managing the temperature can make a huge difference in the final taste and texture.
Charcoal Vs. Gas Grills
Choosing between charcoal and gas grills affects how you set up your rotisserie. Charcoal grills offer a smoky flavor that many barbecue enthusiasts love, but they require more attention to keep a steady temperature. You’ll need to arrange the coals on either side of the grill to create indirect heat, which prevents the chicken from burning while it rotates.
Gas grills, on the other hand, provide consistent heat with less fuss. You can control the temperature with knobs, making it easier to maintain the ideal cooking range. Setting up a gas grill for rotisserie usually means turning off the burners directly under the chicken and using the side burners to cook it evenly.
Preheating And Temperature Control
Preheating your grill ensures the rotisserie starts cooking at the right temperature. Aim for about 300°F to 350°F; this range cooks the chicken evenly without drying it out. If your grill has a built-in thermometer, use it to keep a close eye on the heat.
Adjusting vents on a charcoal grill or burners on a gas grill helps you maintain steady heat throughout the cooking process. It’s easy to get tempted to crank the heat up, but slow and steady is key. Have you ever noticed how a chicken turns out when the heat spikes? It often dries out or burns in spots.
Mounting The Chicken On The Rotisserie
Mounting the chicken on the rotisserie is the foundation for a deliciously even roast. How you position and secure the chicken affects cooking time and flavor. Taking a few extra minutes to mount it properly will pay off with perfectly cooked meat and crispy skin.
Securing The Chicken
Start by inserting the rotisserie spit rod through the chicken’s cavity. Make sure it passes straight through from the neck opening to the tail end.
Use the rotisserie forks to clamp onto the chicken’s body firmly. Tighten the screws on each fork so the bird doesn’t slip or wobble during rotation.
Wrap kitchen twine around the legs and wings to keep them close to the body. This prevents flapping, which can cause uneven cooking and flare-ups.
Have you ever had your chicken spin wildly or fall off the spit? Securing it tightly solves this problem and keeps the heat consistent all around.
Balancing The Load
Balance is key to smooth rotation. An uneven load will strain your rotisserie motor and cause jerky movement.
Check the chicken’s weight distribution by trying to spin the spit rod by hand. If it feels heavy on one side, adjust the position on the rod or redistribute the twine.
Sometimes adding a small piece of foil or a folded paper towel on the lighter side helps balance the load perfectly.
Have you noticed your rotisserie motor struggling or slowing down? This is a sign your chicken isn’t balanced. Fixing it will save you frustration and ensure a beautiful roast.
Credit: whatsgabycooking.com
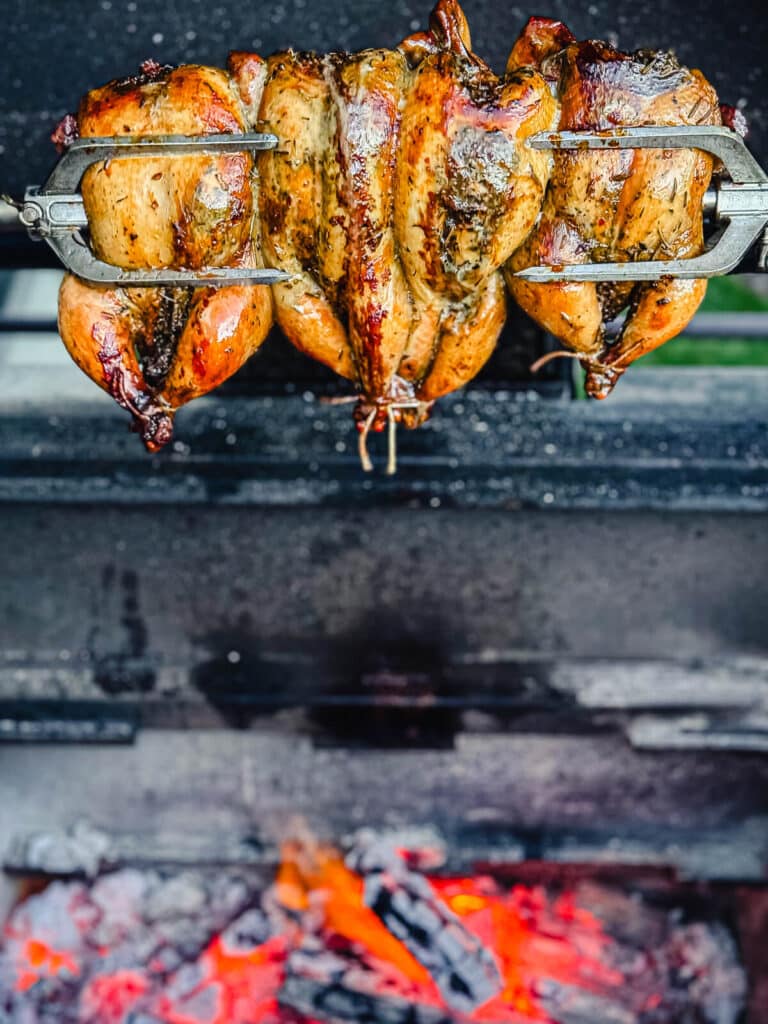
Cooking Techniques
Cooking a chicken on a grill rotisserie requires careful attention to cooking techniques. These techniques help cook the chicken evenly and keep it juicy. Proper control of time and heat makes the difference between a dry bird and a delicious meal.
Monitoring Cooking Time
Keep a close watch on the cooking time. A whole chicken usually takes about 1 to 1.5 hours on the rotisserie. Use a meat thermometer to check the inside temperature. The chicken is done at 165°F (74°C). Avoid opening the grill too often. This keeps the heat steady and cooks the chicken well.
Adjusting Heat Levels
Control the grill’s heat to avoid burning or undercooking. Start with medium heat to brown the skin. Lower the heat after 20 minutes to cook the chicken through. Use indirect heat by turning off burners under the chicken. This prevents flare-ups and keeps the chicken moist.
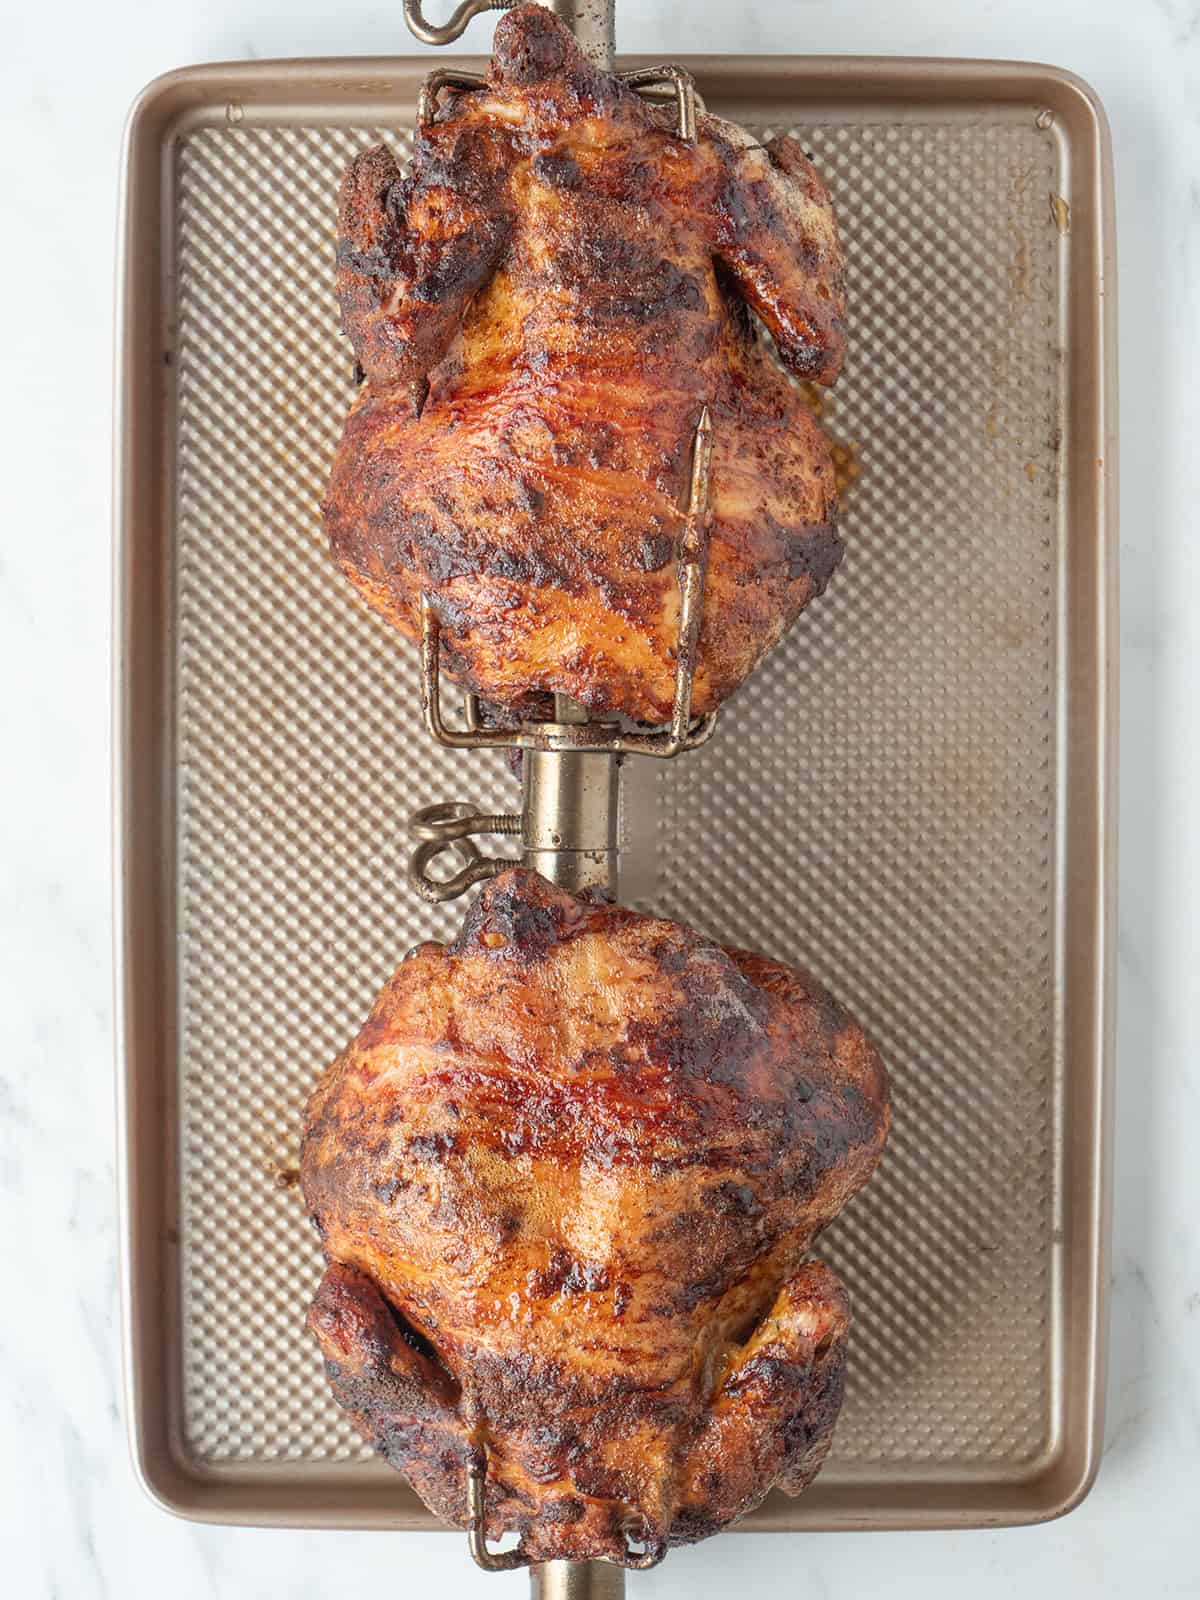
Checking For Doneness
Checking for doneness is key to cooking a chicken safely and perfectly on a grill rotisserie. Proper doneness ensures the chicken is juicy and safe to eat. Overcooking dries the meat, while undercooking risks health issues. Use reliable methods to confirm the chicken is ready before serving.
Using A Meat Thermometer
A meat thermometer is the most accurate way to check doneness. Insert it into the thickest part of the chicken, usually the thigh but not touching bone. The chicken is safe to eat when the thermometer reads 165°F (74°C). Keep the thermometer steady for a few seconds to get an accurate reading.
Visual Cues For Perfect Cooking
Visual signs help judge doneness without tools. The chicken skin should be golden brown and crispy. Juices running clear when pierced mean the meat is cooked through. The meat near the bone should not look pink or raw. These cues help confirm the chicken is ready to enjoy.
Serving And Carving Tips
Serving and carving a rotisserie chicken requires care to keep the meat juicy and attractive. Proper resting and carving enhance the eating experience. Follow simple steps to present your chicken perfectly.
Resting The Chicken
Resting the chicken after grilling lets the juices settle inside. This step prevents the meat from drying out when cut. Place the chicken on a clean plate or cutting board. Cover it loosely with foil to keep warm. Let it rest for about 10 to 15 minutes. This short wait makes the meat tender and flavorful.
Carving For Best Presentation
Use a sharp knife to carve the chicken smoothly. Start by removing the legs and thighs by cutting at the joints. Slice the breast meat against the grain for tender pieces. Arrange the slices neatly on a serving platter. Place legs and wings around the breast for a full look. Garnish with fresh herbs or lemon wedges for extra appeal. Serve with your favorite sides and enjoy.
Troubleshooting Common Issues
Troubleshooting is key when grilling chicken on a rotisserie. It helps fix common problems fast. This keeps your chicken juicy and tasty every time. Understanding these issues lets you enjoy perfect meals without stress.
Uneven Cooking Solutions
Uneven cooking happens when one part of the chicken cooks faster. This results in dry or raw spots. Balance the chicken on the spit. Make sure it is centered and tight. Rotate the spit slowly and evenly. Check heat zones on your grill. Move chicken if one side is hotter. Use a meat thermometer to test for doneness. Aim for 165°F in the thickest part. Cover exposed areas with foil if they cook too fast.
Dealing With Overcooking
Overcooked chicken becomes dry and tough. Lower the grill temperature to avoid this. Keep the lid closed to keep heat steady. Baste the chicken with marinade or oil to keep moisture. Remove the chicken from heat a bit early. Let it rest covered for 10 minutes. This helps juices spread inside. Use a timer to track cooking time closely. Check the chicken often near the end of cooking.
Credit: www.grillseeker.com
Cleaning And Maintenance
Keeping your rotisserie and grill clean and well-maintained not only extends their life but also improves the flavor of your grilled chicken. Neglecting this step can lead to uneven cooking and unpleasant flavors from old grease and residue. How often do you really clean your grill after a cookout?
Cleaning The Rotisserie
After every use, let the rotisserie cool down before you start cleaning. Remove the spit rod and forks, then soak them in warm soapy water for 15-20 minutes to loosen any stuck-on grease.
Use a non-abrasive scrubber or brush to gently clean the metal parts. Avoid harsh chemicals that could damage the finish or leave harmful residues.
Dry everything thoroughly to prevent rust. If you notice any stubborn bits, a paste of baking soda and water can work wonders without damaging the metal.
Maintaining The Grill
Regularly clean the grill grates with a wire brush while they’re still warm to remove food particles. This prevents buildup that could affect heat distribution and flavor.
Check your grill’s grease trap and empty it often to avoid flare-ups. A clogged grease trap can be a fire hazard and cause uneven cooking.
Inspect the rotisserie motor and batteries (if battery operated) before each use to ensure smooth rotation. A failing motor can ruin your perfectly cooked chicken.
Have you ever skipped cleaning your grill and noticed a smoky, unpleasant flavor? Keeping it clean is key to great tasting meals and safe cooking.
Frequently Asked Questions
How Do I Secure The Chicken On A Rotisserie Spit?
Insert the spit through the chicken’s cavity. Use forks to firmly hold the bird in place. Tighten screws to prevent slipping during cooking.
What Temperature Is Best For Grilling Rotisserie Chicken?
Maintain a grill temperature around 300°F to 350°F. This ensures even cooking without drying the chicken. Use indirect heat for best results.
How Long Should A Chicken Cook On A Rotisserie?
Cook the chicken for about 1 to 1. 5 hours. Time varies by size and grill heat. The internal temperature should reach 165°F.
Should I Baste The Chicken While Rotisserie Grilling?
Yes, baste the chicken every 20 minutes. This keeps it moist and adds flavor. Use a marinade or melted butter for best taste.
Conclusion
Grilling chicken on a rotisserie brings great flavor and even cooking. Start by securing the chicken firmly on the spit rod. Balance the bird well to ensure smooth rotation. Keep the heat steady and watch the chicken closely. This method helps lock in juices and creates crispy skin.
Give it time and patience for the best results. Now, enjoy your perfectly grilled rotisserie chicken with family or friends. Simple steps, tasty meals. Worth the effort every time.