
Grilling the perfect burger is an art, and getting the timing just right can make all the difference. If you’re wondering how long to grill burgers at 400 degrees, you’re in the right place.
Whether you like your burger juicy and tender or well-done and crispy, knowing the exact grilling time helps you serve up mouthwatering results every time. Keep reading, and you’ll discover simple tips that make your next barbecue a delicious success.
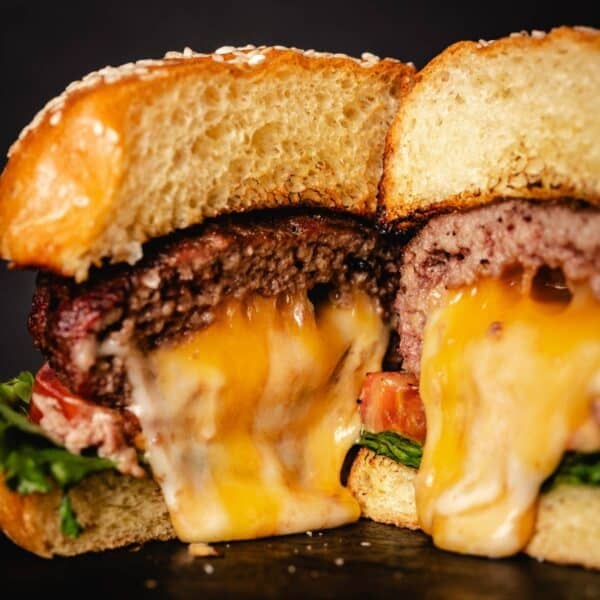
Credit: heygrillhey.com
Choosing The Right Burger
Choosing the right burger is key to a perfect grilling experience at 400 degrees. The type of meat, patty thickness, and seasoning all influence the flavor and cooking time. Knowing these factors helps create juicy, tasty burgers that cook evenly.
Selecting Meat Types
Ground beef is the classic choice for burgers. Look for meat with 15-20% fat for juicy results. Leaner meats like turkey or chicken need careful cooking to avoid drying out. For bold flavors, try blends with pork or lamb. Each type changes cooking time and taste.
Ideal Patty Thickness
Patty thickness affects grilling time and doneness. Aim for about ¾ inch thick for even cooking. Thicker patties take longer and risk burning outside. Thin patties cook fast but can dry out. Press a small dimple in the center to keep shape while grilling.
Seasoning Tips
Simple seasoning enhances the burger’s natural flavor. Use salt and pepper just before grilling. Avoid over-seasoning to keep the meat juicy. Add herbs or garlic for extra taste. Mix seasonings gently into the meat to keep texture firm.

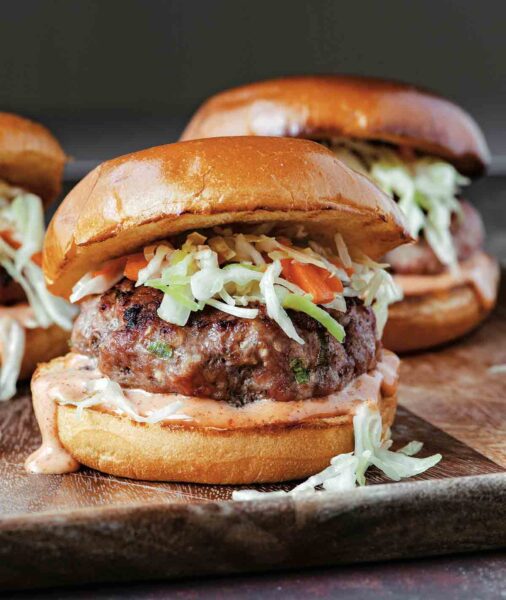
Credit: www.weber.com
Preparing The Grill
Preparing your grill properly is key to cooking burgers perfectly at 400°. It ensures even cooking and prevents sticking, making your grilling experience smooth and enjoyable.
Setting Temperature To 400°
Start by preheating your grill to a steady 400°. This temperature strikes a balance between searing the outside and cooking the inside thoroughly.
Use your grill’s built-in thermometer or a reliable external one to check the heat. Avoid guessing—too high, and the burgers burn; too low, and they dry out.
Give the grill about 10-15 minutes to reach 400°. If your grill doesn’t hold temperature well, adjust the vents or burners to maintain consistent heat.
Cleaning And Oiling The Grates
Clean grates are essential to prevent your burgers from sticking and to achieve those perfect grill marks. Use a stiff wire brush to scrape off any leftover residue from previous grilling sessions.
After cleaning, oil the grates lightly. Dip a folded paper towel in vegetable oil and use tongs to rub it over the bars. This simple step creates a non-stick surface and adds flavor.
Have you noticed how greasy grates can cause flare-ups? Proper cleaning and oiling reduce this risk, keeping your burger juicy without flare-up burnt edges.
Grilling Times For Different Doneness
Grilling burgers at 400°F requires attention to cooking times for the desired doneness. The internal temperature and texture change as the burger cooks. Knowing the right timing helps achieve perfect results. Each doneness level needs a specific grilling duration. This section breaks down how long to grill for rare, medium, and well done burgers.
Rare And Medium Rare
Rare burgers have a cool, red center. Medium rare burgers are warm with a pink middle. Grill rare burgers for about 2 to 3 minutes per side. For medium rare, cook 3 to 4 minutes each side. Use a meat thermometer for accuracy. Rare is about 125°F internal temperature. Medium rare reaches about 135°F.
Medium And Medium Well
Medium burgers are pink throughout but not red. Medium well burgers show only a slight pink center. Grill medium burgers for 4 to 5 minutes per side. Medium well needs 5 to 6 minutes each side. The internal temperature for medium is 140°F to 145°F. Medium well should reach about 150°F to 155°F.
Well Done
Well done burgers have no pink and a firm texture. Grill these for 6 to 7 minutes per side. The internal temperature should be 160°F or higher. Cooking well done ensures all bacteria are killed. Avoid overcooking to keep the burger juicy. Turn the burger carefully to prevent burning.
Techniques For Juicy Burgers
Grilling burgers at 400°F is a great way to get a perfect sear while keeping the inside juicy. But the heat alone won’t guarantee a juicy burger. The techniques you use during grilling play a huge role in how tender and flavorful your burger turns out.
Flipping Tips
Flip your burger only once. Constant flipping can cause the patty to lose juices and dry out. Let the burger cook on one side until you see juices pooling on the top, then flip it gently.
Use a thin spatula to avoid squishing the patty. This helps maintain its shape and keeps the juices inside. Have you noticed how a careful flip often results in a better crust?
Avoiding Pressing The Patty
Pressing down on the burger with your spatula might seem like a quick way to cook faster, but it squeezes out all the flavorful juices. Those juices are what keep the burger moist and tasty.
Resist the urge to press, even if the burger looks like it’s cooking slowly. Trust that the heat will do its job without you squeezing the life out of it. What if your burger could be juicier just by not touching it too much?
Using A Thermometer
Guessing if your burger is done can lead to overcooking or undercooking. A meat thermometer takes the guesswork out of grilling. Insert it into the center of the patty to check the temperature.
For juicy burgers, aim for 160°F for ground beef to be safe but still moist. Checking this way ensures you don’t dry out your burger by leaving it too long on the grill. Could monitoring temperature be the secret step you’ve been missing?
Adding Cheese And Toppings
Adding cheese and toppings is the final touch that can transform your grilled burgers from good to unforgettable. Timing and choice matter a lot here. Knowing when to add cheese and what toppings boost juiciness can make your burger the star of any cookout.
Melting Cheese Perfectly
Place the cheese on your burger about 1 minute before you finish grilling at 400°F. This short time allows the cheese to melt just right without losing its texture or flavor. Cover the grill with a lid to trap heat and speed up melting.
Choose cheeses that melt well, like cheddar, American, or pepper jack. Avoid harder cheeses that won’t soften quickly. Have you tried adding a slice of smoked gouda? It melts beautifully and adds a smoky twist.
Best Toppings For Juiciness
Juicy toppings can balance the charred, smoky flavor of grilled burgers perfectly. Consider fresh tomatoes, pickles, and crisp lettuce for a refreshing crunch. These add moisture without making the bun soggy.
For extra juiciness, add grilled onions or sautéed mushrooms. They bring out savory flavors and retain moisture well. What’s your go-to topping combo that keeps each bite juicy and satisfying?
- Fresh tomato slices
- Pickles for tang
- Crisp lettuce
- Grilled onions
- Sautéed mushrooms
Credit: leitesculinaria.com
Resting And Serving
After grilling your burgers at 400°F, the process isn’t quite finished. Resting and serving are key steps that often get overlooked but can make a big difference in flavor and juiciness. Taking the time to rest your burger lets the juices redistribute, giving you a better eating experience.
Rest Time Importance
Resting your burgers for about 5 minutes after grilling allows the meat fibers to relax. This helps the juices stay inside rather than spilling out when you take the first bite.
Skipping this step can leave you with a dry burger, even if you grilled it perfectly. Think about how often a burger drips juice onto your plate—that’s a sign you didn’t let it rest enough.
Try tenting the burgers loosely with foil to keep them warm while resting. This simple trick keeps the temperature right without steaming the burger.
Serving Suggestions
Once rested, it’s time to serve your burger in a way that enhances its flavor. Choose fresh buns that can hold all the juices without falling apart.
Add toppings that complement the grilled flavor—like crisp lettuce, ripe tomatoes, or sharp cheddar. Consider spreading a layer of sauce on the bun to add moisture and extra taste.
- Toast the buns lightly on the grill for added texture
- Use pickles or caramelized onions for a flavor boost
- Serve with simple sides like sweet potato fries or a fresh salad
What’s your favorite way to dress a burger? Sometimes the best toppings come from experimenting with what you have in the kitchen.
Frequently Asked Questions
How Long Should I Grill Burgers At 400 Degrees?
Grill burgers for about 5 minutes per side at 400 degrees. This results in a medium-rare to medium doneness. Adjust the time for your preferred level of doneness. Always use a meat thermometer for accuracy. For safety, the internal temperature should reach 160°F for beef.
What’s The Ideal Burger Thickness For Grilling?
A burger thickness of about 3/4 inch is ideal for grilling. This allows for even cooking and prevents overcooking. Thicker burgers may require longer cooking times and risk being undercooked inside. Always use a meat thermometer to ensure the burger reaches a safe temperature.
Should I Close The Grill Lid When Cooking Burgers?
Yes, close the grill lid when cooking burgers at 400 degrees. This helps maintain consistent heat and cooks the burgers evenly. Closing the lid also enhances the smoky flavor. Remember to monitor and flip the burgers halfway through the cooking time.
How Do I Know When My Burger Is Done?
Use a meat thermometer to check the burger’s internal temperature. For beef, it should reach 160°F. This ensures the burger is safe to eat. Alternatively, you can check for clear juices running from the burger when it’s pierced with a fork.
Conclusion
Grilling burgers at 400 degrees is quick and easy. Cook each side for about 4 to 5 minutes. This time ensures a juicy and tasty burger. Always check the burger’s internal temperature for safety. Rest the burgers a few minutes before serving.
This helps keep the juices inside. With these simple steps, you can enjoy perfect grilled burgers every time. Give it a try and enjoy your meal!