
Your outdoor kitchen island is the heart of your backyard gatherings. But have you thought about how rain, sun, and moisture can damage it over time?
Waterproofing your outdoor kitchen island isn’t just a smart choice—it’s essential to keep it looking great and lasting longer. In this guide, you’ll discover simple, effective steps to protect your investment. Ready to make your outdoor space weatherproof and worry-free?
Let’s dive in and keep your kitchen island safe from the elements!
Choosing Waterproof Materials
Choosing the right waterproof materials is key to making your outdoor kitchen island last through all kinds of weather. Your materials need to withstand rain, humidity, and temperature changes without losing their charm or function. Let’s look at the best options that combine durability with style.
Water-resistant Countertops
Countertops face the most wear and tear, so picking water-resistant options is crucial. Materials like granite, quartz, and concrete are excellent because they naturally resist moisture and are easy to clean. You might want to avoid wood or laminate unless they are specially treated, as they can warp or peel when exposed to water.
I once installed a granite countertop on my outdoor island, and years later, it still looks brand new despite heavy rain and spills. Would you rather spend time fixing damage or enjoying your outdoor space?
Sealants For Wood And Stone
If you love the look of wood or natural stone, sealants are your best friend. A good waterproof sealant creates a barrier that stops water from penetrating and causing damage. Remember to reapply sealants every year or two to maintain protection, especially after harsh winters or heavy rains.
Try using penetrating sealers on stone surfaces—they soak in rather than just coating the top, which helps avoid peeling. Have you checked if your sealants are still doing their job before the next rainstorm?
Rust-proof Hardware Options
Hardware like screws, hinges, and handles often get overlooked but can rust quickly outdoors. Opt for stainless steel, brass, or powder-coated metals to keep your island looking sharp and functioning smoothly. These materials resist corrosion even when exposed to moisture and salty air.
During a recent remodel, switching to stainless steel fasteners saved me from replacing rusted parts every few months. What’s your plan for keeping your outdoor kitchen hardware rust-free?
Preparing The Surface
Preparing the surface is the first and most important step to waterproof your outdoor kitchen island. A clean and smooth surface helps the waterproof materials stick better. This step makes sure your kitchen island stays protected from water damage for a long time.
Taking time to prepare the surface properly saves effort later. It prevents peeling and cracking of the waterproof coating. Follow these simple steps to get the surface ready for waterproofing.
Cleaning And Drying
Start by removing dirt, dust, and grease from the surface. Use a mild detergent and water to wash the area well. Rinse thoroughly to get rid of soap residue. Let the surface dry completely. Moisture can stop the waterproof layer from sticking properly.
Sanding And Smoothing
Use sandpaper or a sanding block to smooth rough spots. Sanding removes old paint or uneven patches. Wipe off dust after sanding with a clean cloth. A smooth surface helps the primer and waterproof coating bond well.
Applying Primer Or Base Coat
Choose a primer suitable for outdoor surfaces and your waterproofing product. Apply an even layer of primer using a brush or roller. Let it dry according to product instructions. Primer seals the surface and improves adhesion of the waterproof layer.
Sealing Techniques
Sealing your outdoor kitchen island is essential to protect it from rain, humidity, and temperature changes. Proper sealing techniques create a strong barrier that keeps water out, preventing damage and extending your island’s life. Let’s look at some effective ways to seal your outdoor kitchen island.
Applying Waterproof Sealant
Start by choosing a high-quality waterproof sealant designed for outdoor use. These sealants penetrate the surface and form a flexible, water-resistant layer.
Make sure the surface is clean and dry before applying the sealant to get the best results. Use a brush or roller to spread the sealant evenly, covering all exposed areas, especially corners and joints where water tends to collect.
Have you noticed peeling or cracking on your outdoor wood? This usually means the sealant needs reapplication. A timely touch-up can save you costly repairs later.
Using Marine-grade Varnish
Marine-grade varnish offers excellent protection because it’s built to withstand harsh weather and constant water exposure. It forms a hard, glossy finish that repels moisture while highlighting the natural beauty of wood.
Apply the varnish in thin, even coats using a quality brush. Allow each coat to dry fully before adding the next to avoid sticky or uneven surfaces.
If you want your island to look great and stay protected, marine-grade varnish is a smart choice. Do you prefer a glossy or matte finish? Some varnishes offer options to suit your style.
Multiple Coat Application Tips
Applying several coats of sealant or varnish is key to building a durable water barrier. One coat is rarely enough for outdoor exposure.
- Lightly sand between coats to help the next layer stick better.
- Wait for each coat to dry completely; rushing leads to peeling.
- Apply at least three coats for optimal protection.
Remember, patience pays off. Skipping steps can leave your island vulnerable. Have you ever rushed a project only to fix it later? Taking your time now avoids that frustration.
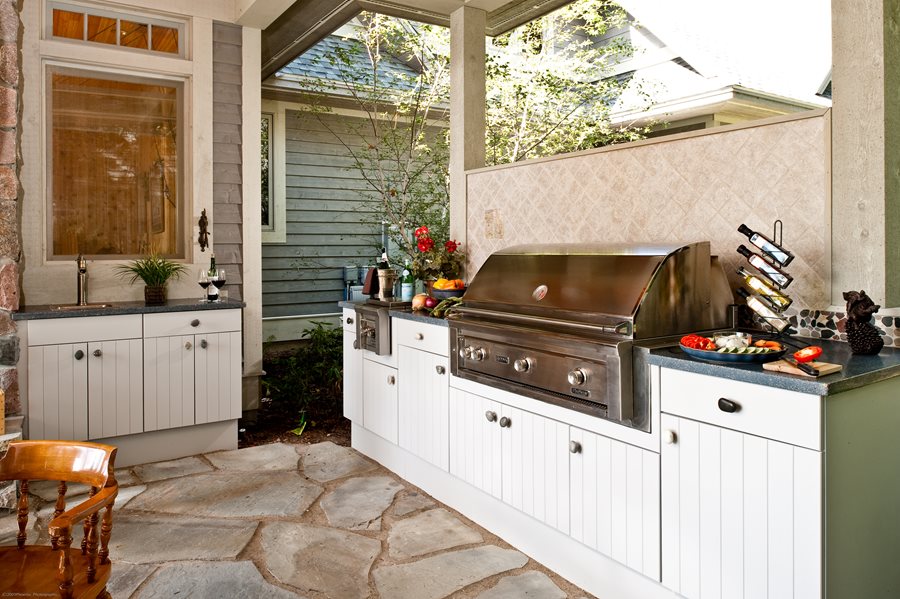
Credit: www.landscapingnetwork.com
Protecting Appliances And Fixtures
Protecting the appliances and fixtures in your outdoor kitchen island is crucial for extending their life and maintaining their performance. Water damage can cause rust, electrical failures, and costly repairs. Taking a few simple steps to shield these components from moisture will save you time and money in the long run.
Waterproof Covers
Using waterproof covers is one of the easiest ways to protect your appliances. Choose covers made from durable, weather-resistant materials that fit snugly over grills, refrigerators, and sinks.
Make sure the covers have ventilation features to prevent mold and mildew buildup underneath. I once left a grill uncovered during a rainy season and ended up with rust spots that could have been avoided with a proper cover.
Proper Drainage Installation
Water pooling around your kitchen island can cause serious damage to fixtures. Installing proper drainage helps direct water away from sensitive appliances.
Check that the island’s surface slopes slightly toward a drain or gutter system. This simple adjustment keeps water from sitting on countertops or seeping into cabinets.
Sealing Electrical Components
Electrical parts are especially vulnerable to water damage. Seal all wiring and outlets with waterproof, weatherproof covers designed for outdoor use.
Use silicone caulk around any gaps or joints where water could enter. I’ve found that investing in high-quality waterproof seals prevents unexpected electrical shorts during storms.
Maintaining Waterproofing
Maintaining waterproofing is key to protecting your outdoor kitchen island from water damage. Regular care keeps the materials strong and prevents costly repairs. Simple steps help maintain a watertight seal and extend the life of your kitchen island.
Regular Inspections
Check your outdoor kitchen island often for cracks or worn areas. Look closely at seams, edges, and joints where water can seep in. Early detection of issues stops damage from spreading. Use a flashlight to see hard-to-reach spots clearly.
Reapplying Sealant
Sealants wear down with sun, rain, and temperature changes. Apply a fresh layer of waterproof sealant every year or as needed. Clean the surface well before applying sealant. Choose a product made for outdoor use and follow the instructions carefully.
Handling Wear And Damage
Fix any cracks or chips immediately to keep water out. Use waterproof filler or patch kits designed for your island’s material. Replace any damaged parts that cannot be repaired. Addressing damage quickly prevents bigger problems later.

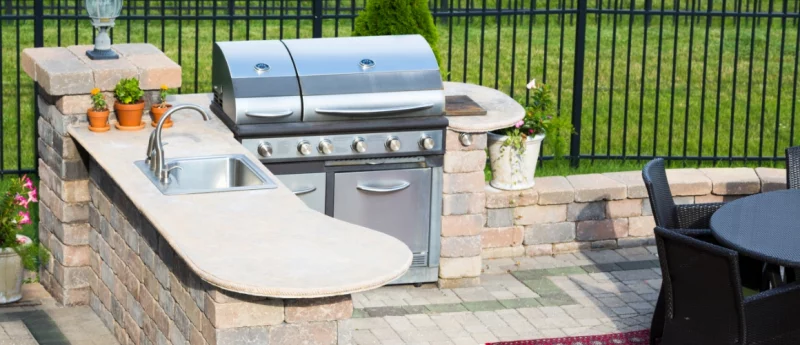
Credit: www.angi.com
Additional Weatherproofing Tips
Protecting your outdoor kitchen island from harsh weather requires more than just sealing the surfaces. You can extend its life and keep it looking great by adding extra layers of weatherproofing. These simple steps will help you shield your investment from rain, sun, and wind without complicated setups.
Using Outdoor Furniture Covers
Outdoor furniture covers provide a quick and affordable way to protect your kitchen island. Choose covers made from waterproof, breathable materials to prevent moisture buildup and mold.
Look for covers that fit snugly and have secure fasteners like elastic hems or Velcro straps. This keeps the cover in place during strong winds and ensures full coverage.
Have you noticed how much longer your patio furniture lasts when covered? The same principle applies here—covering your island daily or after use can prevent weather damage significantly.
Installing Overhead Protection
Adding a pergola, awning, or canopy above your outdoor kitchen island offers excellent protection against rain and sun. These structures block direct exposure, reducing the need for frequent maintenance.
Consider retractable awnings if you want flexibility—open them on sunny days and close them during storms. This balance helps maintain your island’s condition without sacrificing outdoor enjoyment.
Think about your local climate. Does your area experience sudden downpours? Overhead protection can save you from unexpected damage and extend the usability of your kitchen island.
Landscaping For Water Drainage
Proper landscaping around your outdoor kitchen island prevents water pooling that can cause damage over time. Create gentle slopes directing water away from the base to keep the foundation dry.
Installing gravel beds or French drains nearby can also improve drainage and reduce mud splash onto your kitchen surfaces. These simple additions work silently but effectively.
Have you checked if your patio slopes toward your island? Adjusting the landscape might be the easiest fix to prevent water-related issues without extra waterproofing products.
Credit: www.coversandall.co.uk
Frequently Asked Questions
How Do I Waterproof An Outdoor Kitchen Island?
Start by sealing all surfaces with a high-quality waterproof sealant. Use weather-resistant materials like stone or treated wood. Ensure proper drainage and cover the island when not in use to protect from rain and moisture.
What Materials Resist Water In Outdoor Kitchen Islands?
Materials like granite, concrete, stainless steel, and treated wood resist water well. These materials prevent water damage and withstand outdoor elements effectively, making them ideal for outdoor kitchen islands.
Can Sealants Protect Outdoor Kitchen Countertops From Water?
Yes, applying a waterproof sealant creates a protective barrier on countertops. This prevents water absorption, reduces staining, and prolongs countertop life in outdoor kitchen islands.
How Often Should I Reapply Waterproofing On My Outdoor Kitchen?
Reapply waterproofing sealants every 1-2 years, depending on weather exposure. Regular maintenance ensures continuous protection against moisture and extends your outdoor kitchen island’s durability.
Conclusion
Waterproofing your outdoor kitchen island is crucial. It ensures durability and longevity. Proper sealing protects against rain, snow, and humidity. Regular maintenance prevents water damage. Use quality materials for effective waterproofing. Consider professional help for best results. This investment preserves your outdoor space.
Enjoy cooking outdoors without worry. A well-protected kitchen enhances your outdoor living experience. Take action today and safeguard your kitchen island. Your future self will thank you. Stay proactive and enjoy peace of mind.