
Are you ready to take your rotisserie cooking to the next level? Using a prep table correctly can make all the difference in how easy and enjoyable your cooking experience becomes.
Whether you’re a beginner or have some experience, knowing how to organize and use your prep table will save you time and help you create mouthwatering meals every time. You’ll discover simple tips and tricks to set up your prep table perfectly for rotisserie cooking.
Keep reading, and you’ll soon master the secret to smoother prep work and tastier results!
Choosing The Right Prep Table
Choosing the right prep table for rotisserie work is essential for smooth kitchen operations. It affects your efficiency and food safety. The right table helps you organize tools and ingredients close to your cooking area. It also makes cleaning easier and speeds up your workflow.
Size And Capacity
Select a prep table size that fits your kitchen space. It should have enough surface area for cutting and seasoning meat. Consider how many rotisserie chickens or items you prepare daily. A larger capacity table helps handle more food without clutter. Check the height to ensure comfortable working posture and reduce strain.
Material And Durability
Stainless steel is the best choice for prep tables. It resists rust, stains, and scratches. It is easy to clean and sanitize. Avoid tables made from materials that absorb moisture or odors. Durable tables last longer and withstand heavy use. This keeps your workspace safe and hygienic.
Features To Consider
- Storage shelves or drawers for spices and tools
- Built-in cutting boards or removable tops
- Casters or wheels for easy movement
- Under-table refrigeration for keeping ingredients fresh
- Drainage system to manage liquids and spills
These features improve your prep work speed and organization. Choose based on your specific kitchen needs and workflow.
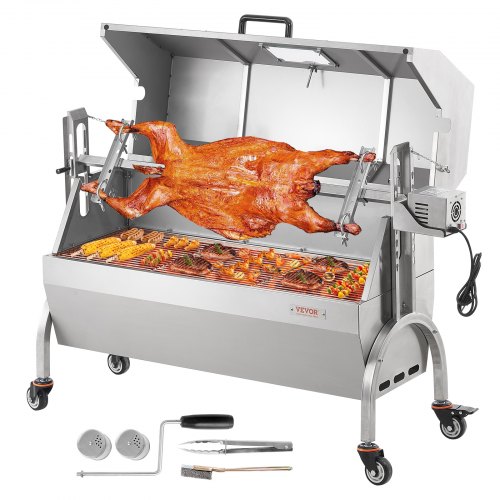
Credit: www.vevor.ca
Setting Up Your Prep Table
Setting up your prep table correctly can make a huge difference in how smoothly your rotisserie cooking goes. It’s not just about having a surface to work on—it’s about creating a well-organized, efficient space that keeps everything you need within easy reach. Let’s look at how to arrange and maintain your prep table for the best results.
Optimal Placement
Place your prep table close to the rotisserie but not too close to cause clutter or safety hazards. You want to minimize the distance you walk back and forth, especially when handling hot or heavy items. Think about your workflow—where do you naturally move during cooking? Position the table so it complements that flow.
Also, consider lighting. Good lighting on your prep table helps you see what you’re doing and reduces mistakes. If you’re working outdoors, a shaded spot can prevent ingredients from overheating or drying out too quickly.
Organizing Tools And Ingredients
Keep your tools and ingredients sorted to avoid wasting time searching. Use small containers or trays to separate spices, marinades, and basting brushes. Group similar items together—knives on one side, seasonings on another.
Think about what you’ll use most often. Place those items front and center on your prep table. For example, if you baste frequently, keep the brush and sauce bowl right at hand. This simple setup helped me speed up my cooking process and avoid last-minute scrambles.
- Use magnetic strips or hooks for hanging utensils.
- Label containers for quick identification.
- Keep a cutting board directly on the table for easy chopping.
Maintaining Cleanliness
A clean prep table isn’t just about looks—it’s critical for food safety. Wipe down surfaces regularly, especially after handling raw meat or poultry. A quick spray of disinfectant and a clean cloth can prevent cross-contamination.
Keep a dedicated trash bowl or container on your prep table to collect scraps and packaging immediately. This habit keeps your workspace tidy and reduces distractions. Have you noticed how much faster you work when your area is clutter-free?
Finally, schedule short breaks during cooking to clean and reorganize. It might feel unnecessary at first, but you’ll find it keeps your workflow steady and your food safe.
Prepping Ingredients For Rotisserie
Prepping ingredients for rotisserie is key to tasty, evenly cooked meals. Use a prep table to organize and ready all items before cooking. This space helps keep ingredients fresh and clean. Proper preparation also saves time during the cooking process. Follow simple steps to marinate, trim, season, and skewer ingredients for the best results.
Marinating Techniques
Marinating adds flavor and tenderness to meats. Use a mix of oil, acid, and spices for the marinade. Place ingredients in a sealed container or bag. Keep them refrigerated while marinating. Turn the meat occasionally to coat evenly. Avoid over-marinating to prevent mushy texture.
Trimming And Seasoning
Trim excess fat and skin for even cooking and better taste. Remove any silver skin or tough parts. Pat meat dry before seasoning to help spices stick. Use simple seasonings like salt, pepper, garlic, and herbs. Apply seasoning evenly on all sides for balanced flavor.
Skewering Tips
Choose sturdy skewers that fit the rotisserie properly. Soak wooden skewers in water to prevent burning. Thread ingredients tightly but not overcrowded. Alternate meat with vegetables for even cooking. Make sure all pieces are similar size for uniform heat exposure.
Maximizing Workflow Efficiency
Maximizing workflow efficiency at the prep table boosts rotisserie cooking speed. Organizing tasks and tools properly helps reduce delays. A smooth workflow keeps the kitchen active and productive. It also lowers stress and errors during food prep.
Streamlining Prep Steps
Arrange ingredients by use and cooking order. Keep knives, cutting boards, and seasonings within reach. Prep meats, vegetables, and marinades in separate zones. Clear the workspace often to avoid clutter. Use containers to hold trimmed parts or scraps. This keeps the surface clean and ready.
Time-saving Hacks
- Pre-measure spices and sauces in small bowls.
- Use a sharp knife to speed cutting tasks.
- Marinate meats in advance, then place on the rotisserie.
- Keep a trash bowl nearby to quickly discard waste.
- Use a timer to track prep and cooking times.
Coordinating With Cooking Process
Match prep speed with rotisserie rotation and heat levels. Start prepping the next batch while one cooks. Check the meat’s doneness regularly to avoid overcooking. Clean tools and surfaces during wait times. This keeps everything ready for the next step.
Maintaining And Cleaning The Prep Table
Keeping your prep table clean and well-maintained is key to ensuring food safety and extending the life of your equipment. A dirty prep table can quickly become a breeding ground for bacteria, which affects not only the quality of your rotisserie dishes but also the health of your customers. By adopting a consistent cleaning routine and understanding the best practices for maintenance, you can avoid common pitfalls and keep your workspace efficient and hygienic.
Daily Cleaning Routine
Start each day by wiping down all surfaces with warm, soapy water to remove grease and food particles. Use a clean cloth or sponge and focus on corners and edges where dirt can accumulate. After washing, sanitize the surface with a food-safe disinfectant spray to kill any remaining germs.
Don’t forget to clean underneath the table and any storage areas daily. Drips and crumbs often hide here, inviting pests. Also, empty and clean any trash bins nearby to avoid unpleasant odors and contamination.
Preventing Cross-contamination
Separate raw and cooked foods on your prep table to stop bacteria from spreading. Use color-coded cutting boards and utensils for different types of meat and vegetables. This simple step can dramatically reduce the risk of foodborne illness.
Always wash your hands thoroughly before handling food and after touching raw meat. Gloves are helpful, but they must be changed frequently. Ask yourself: Are you changing gloves or cleaning tools often enough during busy prep times?
Long-term Maintenance
Beyond daily cleaning, schedule deep cleans weekly or monthly depending on usage. Disassemble any removable parts of the prep table to clean inside hard-to-reach areas. This prevents buildup that can cause odors or mechanical issues.
Inspect the table regularly for signs of wear, such as rust or loose screws. Address small problems before they turn into costly repairs. Remember, a well-maintained prep table not only looks professional but also supports smooth kitchen operations.
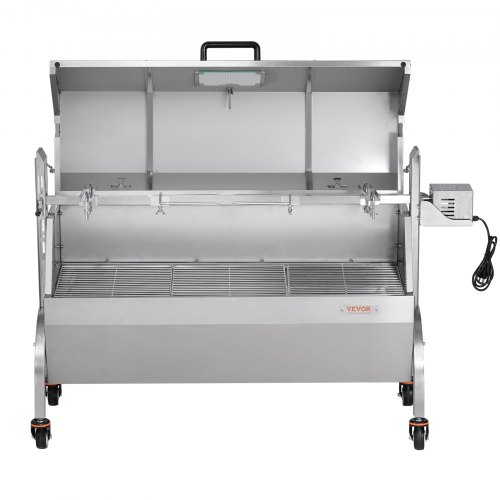
Credit: www.vevor.ca
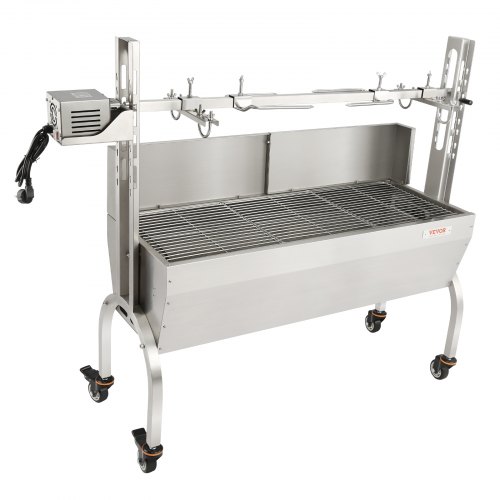
Credit: www.vevor.ca
Frequently Asked Questions
What Is The Purpose Of A Prep Table For Rotisserie?
A prep table organizes ingredients and tools near the rotisserie. It speeds up cooking and keeps everything within reach. This setup boosts efficiency and hygiene during food preparation.
How Do I Set Up A Prep Table For Rotisserie?
Place the prep table close to your rotisserie grill. Arrange utensils, spices, and marinades neatly. Ensure easy access to raw and cooked foods while maintaining cleanliness.
Can Prep Tables Improve Rotisserie Cooking Speed?
Yes, prep tables streamline the cooking process. Having all ingredients and tools ready saves time. This reduces interruptions and helps maintain consistent cooking temperatures.
What Materials Are Best For A Rotisserie Prep Table?
Stainless steel is ideal for durability and easy cleaning. It resists heat and corrosion, perfect for outdoor use. Avoid porous materials to prevent bacterial growth.
Conclusion
Prep tables simplify rotisserie cooking. They keep ingredients organized. This setup saves time and effort. You stay focused on cooking, not searching. Safety improves with everything within reach. Cleanliness is easier to maintain. Your rotisserie meals become more enjoyable. Guests and family will notice the difference.
Your kitchen becomes a more efficient space. A prep table is a practical tool. It enhances your cooking experience. Try it and see the benefits. Cooking can become more fun. Enjoy the process and the delicious results.