
Imagine stepping outside to your backyard, where the irresistible aroma of freshly baked pizza fills the air. Your outdoor kitchen island is already the heart of your gatherings—but adding a pizza oven will take it to a whole new level.
If you’ve ever dreamed of making restaurant-quality pizza right at home, this guide is made for you. You’ll discover simple, practical steps to add a pizza oven to your outdoor kitchen island, transforming your space into the ultimate spot for delicious meals and unforgettable moments.
Ready to turn your backyard into a pizza lover’s paradise? Let’s get started!
Choosing The Right Pizza Oven
Choosing the right pizza oven for your outdoor kitchen island is key to enjoying delicious homemade pizzas. The right oven fits your space, cooking style, and fuel preferences. Picking the best oven ensures easy use and great results every time.
Types Of Pizza Ovens
There are several types of pizza ovens to consider:
- Wood-fired ovens:Classic choice, adds smoky flavor.
- Gas ovens:Easy to control temperature, fast heating.
- Electric ovens:Convenient for small spaces, simple to use.
- Portable ovens:Flexible, can move around as needed.
Each type offers different benefits. Choose one that fits your cooking style.
Size And Capacity Considerations
Measure your outdoor kitchen space before buying an oven. Size matters for comfort and efficiency.
- Consider how many pizzas you want to cook at once.
- Think about the oven’s footprint and installation needs.
- Larger ovens take more space but cook more pizzas.
- Smaller ovens fit tighter spaces and heat up quickly.
Balance size with your cooking needs and available space.
Fuel Options
Fuel type affects cooking taste, time, and oven setup.
- Wood:Adds authentic flavor, requires more effort.
- Gas:Easy to use, consistent heat, less smoke.
- Electric:Simple installation, good for limited outdoor spaces.
Choose fuel that fits your lifestyle and cooking preferences.
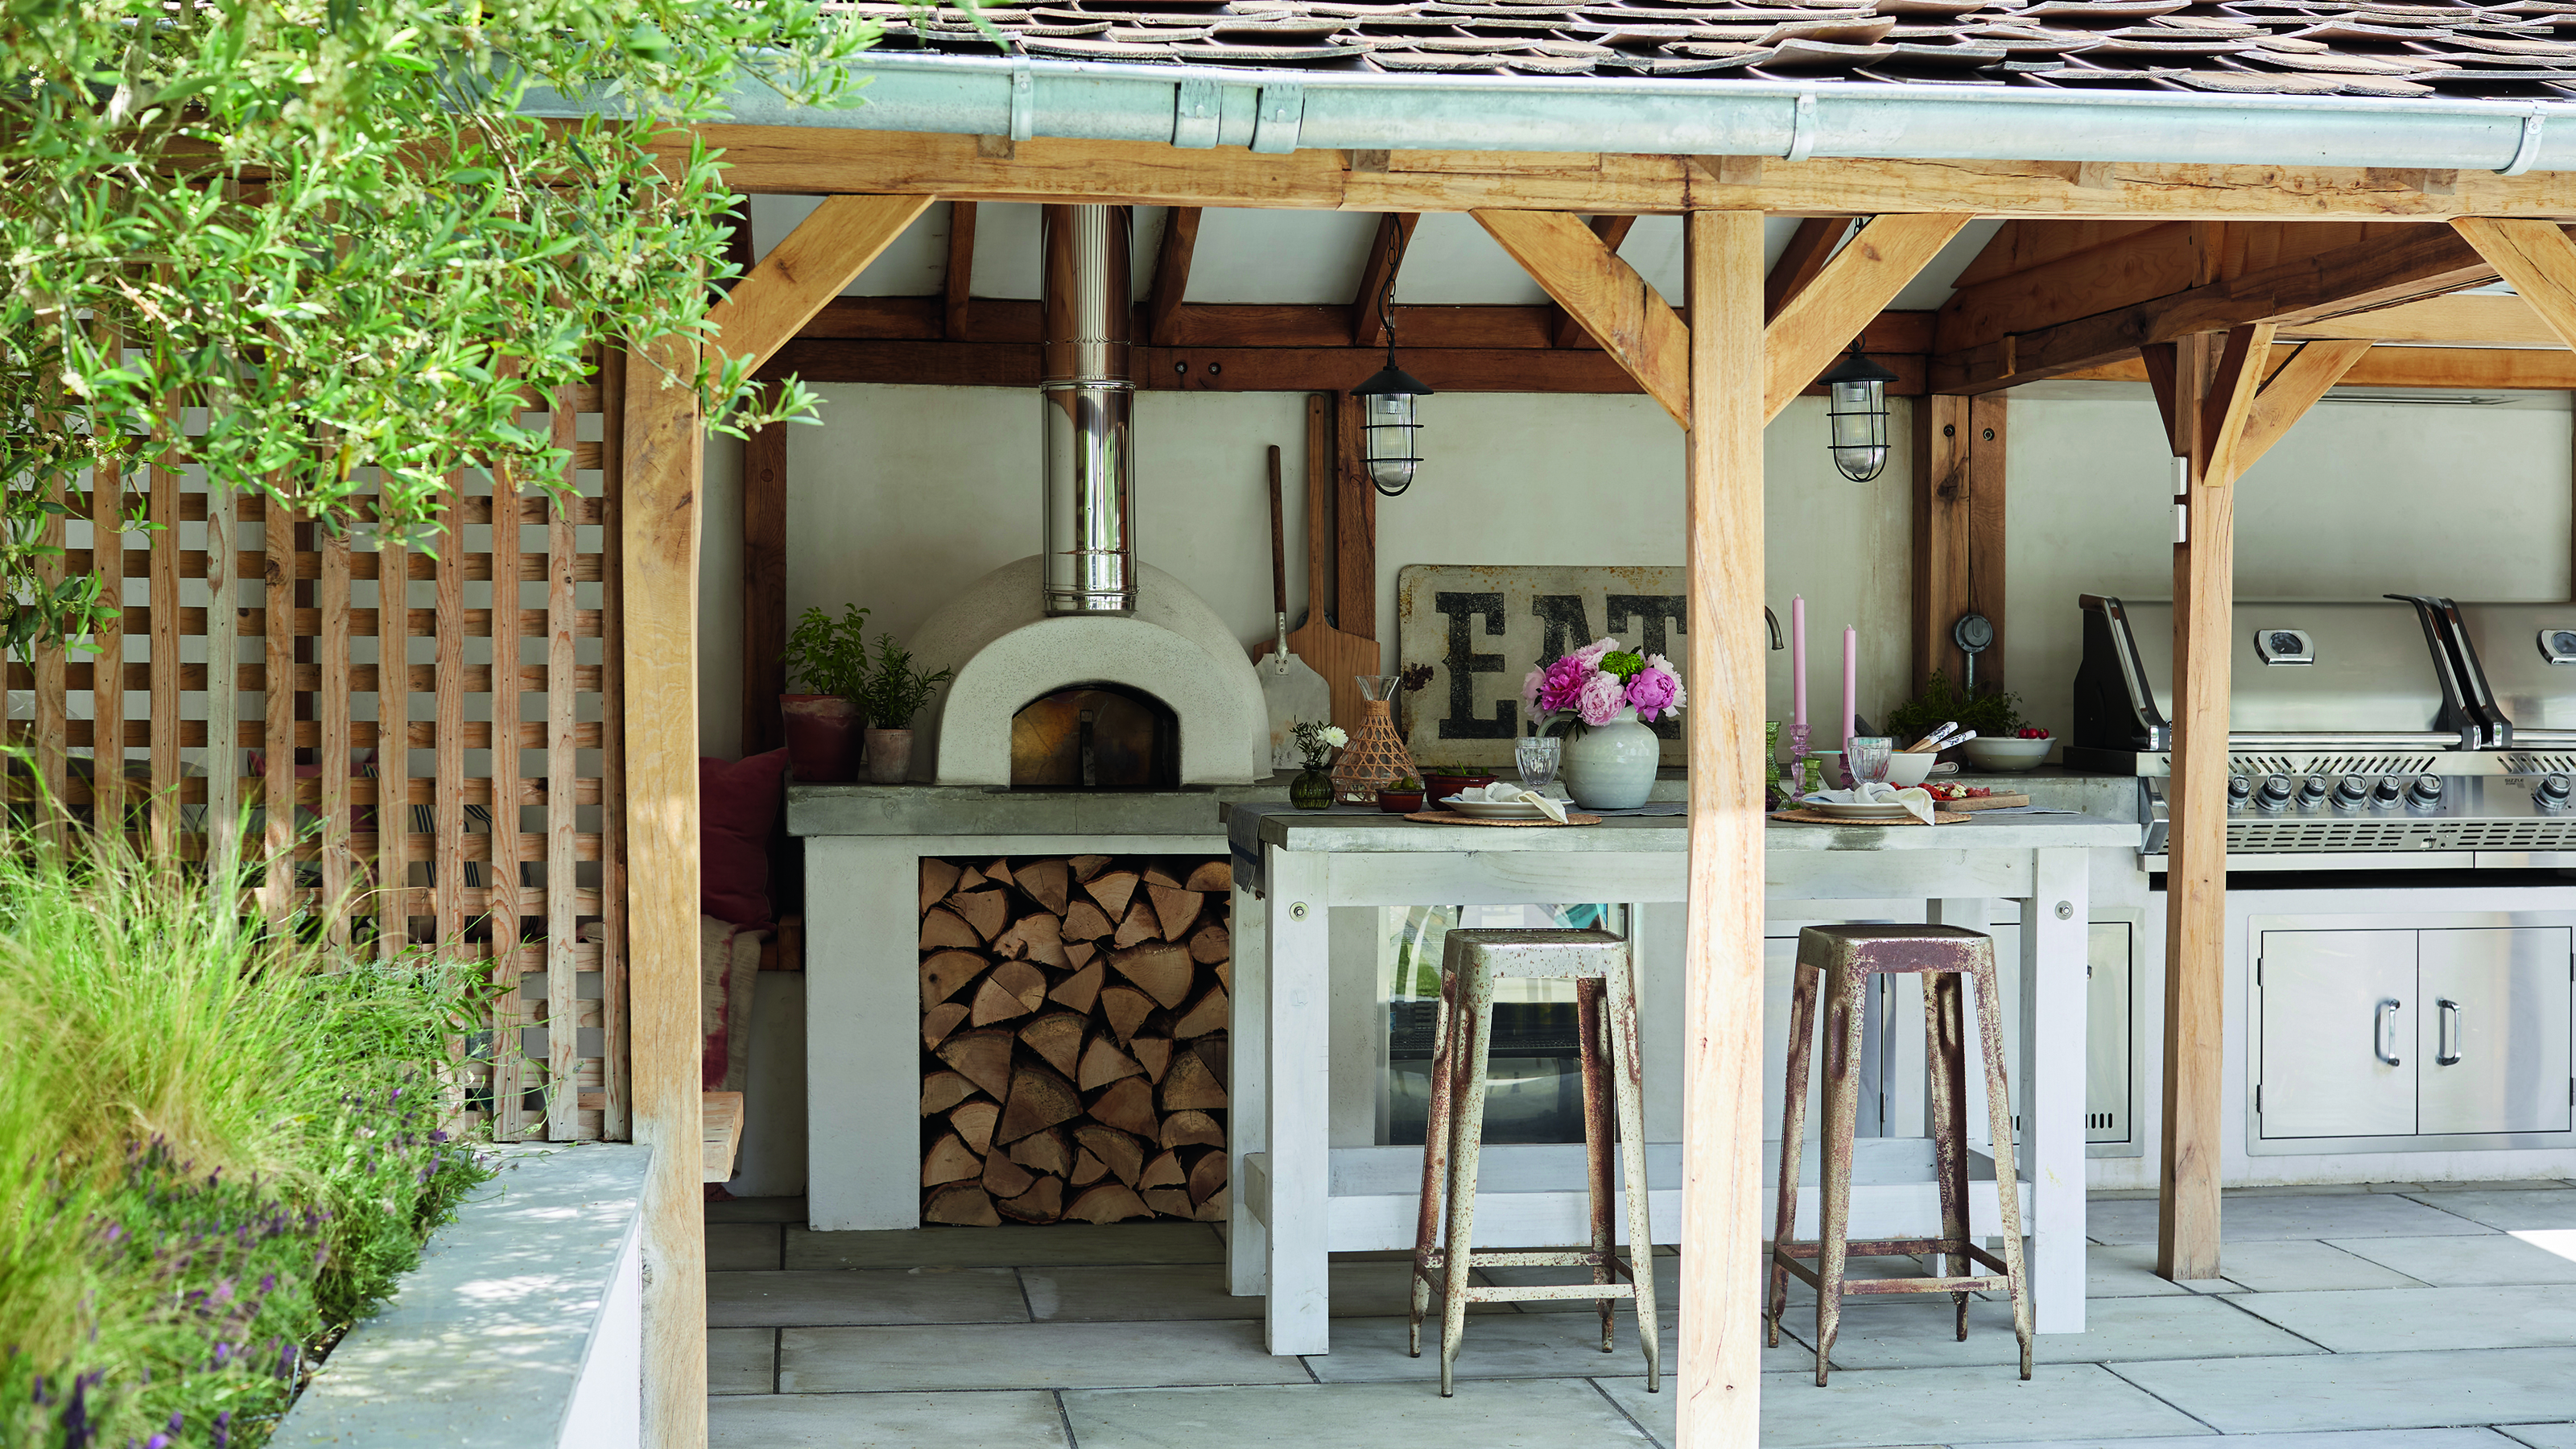
Credit: www.idealhome.co.uk
Planning Your Outdoor Kitchen Island
Planning your outdoor kitchen island is a key step before adding a pizza oven. Thoughtful planning saves space and improves cooking flow. It helps create a comfortable and practical cooking area. Focus on location, size, and design to make the best use of your outdoor space.
Selecting The Location
Choose a spot that is easy to access from your home and yard. Consider the wind direction to avoid smoke blowing into seating areas. Place the oven away from flammable materials and traffic paths. Make sure there is enough room for safe movement around the oven.
Measuring Space Requirements
Measure the available space carefully to fit the oven and other kitchen elements. Allow extra space for prep areas, storage, and seating if needed. Remember to leave clearance for oven doors and ventilation. Proper measurements prevent crowded or unusable spaces.
Designing For Functionality
Plan your kitchen island layout to support easy cooking and serving. Include countertops for pizza prep and areas for plates and utensils. Think about storage options for firewood or cooking tools. Design lighting and power sources near the oven for convenience.
Preparing The Base And Structure
Preparing the base and structure is a key step when adding a pizza oven to your outdoor kitchen island. A strong, stable foundation keeps the oven safe and working well. You must choose the right materials and build carefully to ensure long-lasting results. Weatherproofing also protects your investment from outdoor elements.
Materials For The Island
Select durable materials that can handle heat and outdoor conditions. Concrete blocks and bricks are popular choices. They provide strength and stability. Use fire-resistant materials near the oven to prevent damage.
- Concrete blocks for core structure
- Fire bricks around the oven area
- Steel reinforcements for extra support
- Heat-resistant mortar to bind bricks
Choose materials that blend with your outdoor decor. This keeps the kitchen island attractive and functional.
Building A Stable Foundation
A solid foundation prevents cracks and shifting. Start by clearing the area of debris and leveling the ground. Pour a concrete slab at least 4 inches thick. Let it cure fully before building on it. Use metal anchors or rebar to strengthen the base. Check for level surfaces to avoid uneven weight distribution.
Weatherproofing Tips
Protect your kitchen island from rain, wind, and sun. Apply a waterproof sealant to concrete and bricks. Cover exposed metal parts with rust-resistant paint. Use weatherproof covers for the oven when not in use. Ensure proper drainage around the island to prevent water pooling. These steps increase durability and reduce maintenance needs.

Credit: www.hgtv.com
Installing The Pizza Oven
Installing a pizza oven into your outdoor kitchen island transforms your space into a culinary hotspot. It’s more than just placing the oven; it’s about choosing the right spot, securing it properly, and ensuring all connections work flawlessly. Let’s look at how to get these steps right so your oven performs perfectly and lasts for years.
Positioning The Oven
Think about where your pizza oven will get the best airflow and be easy to access while cooking. Avoid placing it too close to walls or overhangs to prevent heat damage or smoke issues. Consider how you move around your outdoor kitchen—your oven should be part of a smooth workflow.
Also, check the ground surface. A stable, level base is crucial to keep your oven steady and safe. If you’ve ever seen an oven wobble or lean, you know it’s not just annoying—it can be dangerous.
Securing The Oven In Place
Once the position feels right, it’s time to lock it down. Many pizza ovens come with brackets or mounting kits—use these to anchor your oven firmly to the island structure. This prevents any accidental shifts, especially on windy days or when the oven door is opened forcefully.
If your oven is heavy, you might want to reinforce the island base. Adding support beams or a concrete slab can handle the weight and reduce any risk of damage. Don’t skip this step; a solid foundation supports your oven’s longevity.
Connecting Fuel And Utilities
Fuel type dictates your connection approach. For wood-fired ovens, ensure you have a safe storage spot nearby and proper ventilation. Gas ovens need a certified gas line hookup—never attempt this without a professional’s help.
Electric ovens require a dedicated outlet with the right voltage and weatherproofing. Planning these connections early can save you from costly adjustments later. Have you checked local codes for outdoor appliance installations? Compliance keeps you safe and avoids fines.
Finishing Touches
Finishing touches bring style and function to your outdoor kitchen island with a pizza oven. These final details create a welcoming space for cooking and socializing. Thoughtful design enhances usability and comfort, making your outdoor area truly inviting.
Adding Countertops And Storage
Choose durable countertops that resist heat and weather damage. Materials like granite, concrete, or stainless steel work well. Include extra counter space beside the pizza oven for prepping and serving.
Storage keeps tools and ingredients organized and close. Install cabinets or shelves under the island. Use waterproof and easy-to-clean materials for longevity.
Incorporating Seating Areas
Seating invites guests to relax and enjoy the cooking process. Bar stools or built-in benches fit well around the island. Arrange seating to face the pizza oven, encouraging interaction.
Use weather-resistant furniture with comfortable cushions. Ensure enough space for easy movement around the island.
Lighting And Ventilation
Proper lighting ensures safety and ambiance for evening gatherings. Install overhead lights or task lighting near the oven and prep areas. Soft, warm lights create a cozy atmosphere.
Ventilation is crucial to remove smoke and heat. Use a vent hood or chimney above the oven. Good airflow keeps the space fresh and comfortable during cooking.

Credit: cornerstone.rocks
Safety And Maintenance
Adding a pizza oven to your outdoor kitchen island is exciting, but safety and maintenance should be top priorities. Without proper care, your oven could become a hazard or lose its efficiency. Taking the right steps ensures your cooking space stays safe and your oven performs well for years.
Fire Safety Measures
Place your pizza oven on a non-flammable surface like stone or concrete. Keep a safe distance from any flammable materials, such as wooden cabinets or outdoor furniture.
Always have a fire extinguisher nearby—know how to use it before lighting the oven. Avoid wearing loose clothing that can catch fire easily when cooking. Never leave the oven unattended while it’s burning.
Do you have a designated spot for your oven that meets these safety rules? If not, consider rearranging your outdoor kitchen layout to prevent accidents.
Cleaning The Oven
After every use, remove ashes and leftover food debris to prevent buildup. Use a brush with stiff bristles to clean the oven floor and walls once they cool down.
Avoid harsh chemicals; instead, use warm water and mild soap for stubborn stains. Regular cleaning keeps your oven ready for the next pizza night and helps maintain its flavor quality.
Have you noticed how a clean oven bakes more evenly? Keeping your oven spotless is key to perfect crusts and consistent heat.
Regular Maintenance Tips
Inspect your oven regularly for cracks or damage in the fire bricks and structure. Small cracks can expand and affect heat retention or safety.
Check the oven door, chimney, and seals to ensure they fit tightly and work properly. Replace any worn parts promptly to avoid heat loss or smoke leakage.
Schedule a deep clean and thorough inspection at least twice a year, especially before the busy cooking season. Taking these steps helps your pizza oven last longer and stay safe.
Frequently Asked Questions
How Do I Choose The Right Pizza Oven For My Outdoor Kitchen Island?
Select a pizza oven based on size, fuel type, and cooking style. Consider wood-fired or gas options for authentic flavor. Ensure the oven fits your island space and matches your cooking needs.
What Materials Are Best For Building An Outdoor Kitchen Island?
Use weather-resistant materials like stainless steel, stone, or brick. These materials withstand outdoor conditions and provide durability. Choose materials that complement your pizza oven and overall kitchen design.
How Much Space Is Needed For A Pizza Oven On An Island?
Allow at least 3 to 4 feet of clearance around the oven. This space ensures safe operation and comfortable cooking. Plan for ventilation and countertop space for prep and serving.
Can I Install A Pizza Oven Myself On My Outdoor Kitchen Island?
DIY installation is possible with proper skills and tools. Follow manufacturer instructions and local building codes. For complex setups, consider hiring a professional to ensure safety and efficiency.
Conclusion
Adding a pizza oven transforms your outdoor kitchen island. It brings joy and versatility. You can enjoy delicious homemade pizzas anytime. Friends and family will love gatherings at your place. A pizza oven is a great investment. It enhances your outdoor cooking experience.
Installation is straightforward with the right guidance. Remember to consider your space and needs. Choose the perfect oven for your lifestyle. Enjoy creating memorable meals and moments. Happy cooking!